
Overview
- The flexVPN occur because traditional crypto maps is not sclabale, FlexVPN attaches IPsec directly to a Tunnel Interface.
- Traditional site-to-site IPsec
LAN
 |
Router
 |
Crypto Map
 |
Physical Interface
 |
Internet- With Flex VPN we configure the Ipsec more scalable.
LAN
 |
Router
 |
Tunnel Interface
 |
IPsec Profile
 |
Physical Interface
 |
Internet- we can attach dynamic routing to this interface tunnel instead static routes.
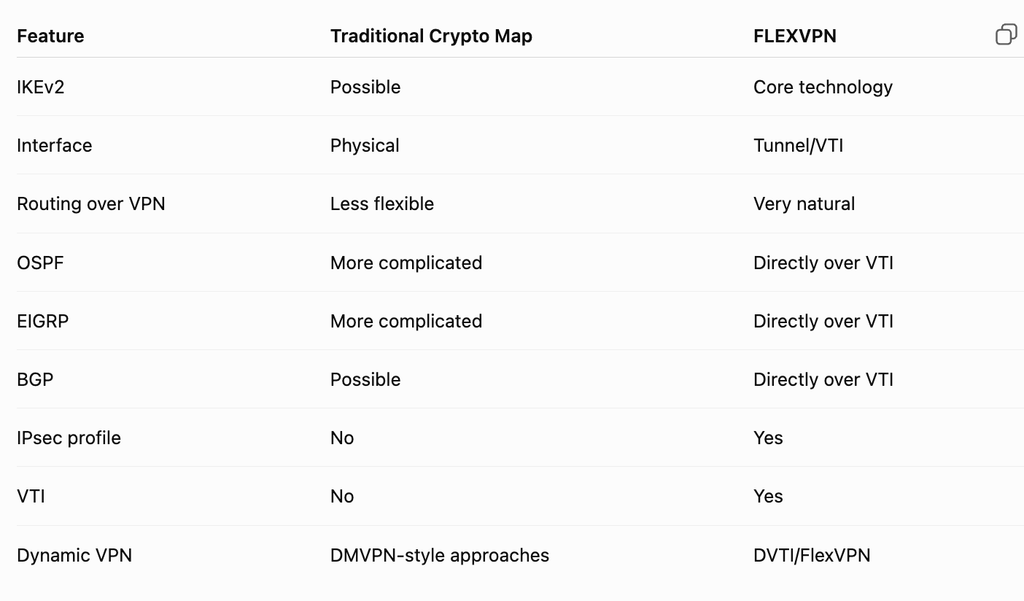
- Comparison ipsec FlexVPN vs Traditional IPsec
- FlexVPN component configurations
IKEv2 Proposal
      ↓
IKEv2 Policy
      ↓
IKEv2 Keyring
      ↓
IKEv2 Profile
      ↓
IPsec Transform Set
      ↓
IPsec Profile
      ↓
Tunnel Interface- We can configure FLexVPN to secure L3 connection with routing or L2 connections.
Topology
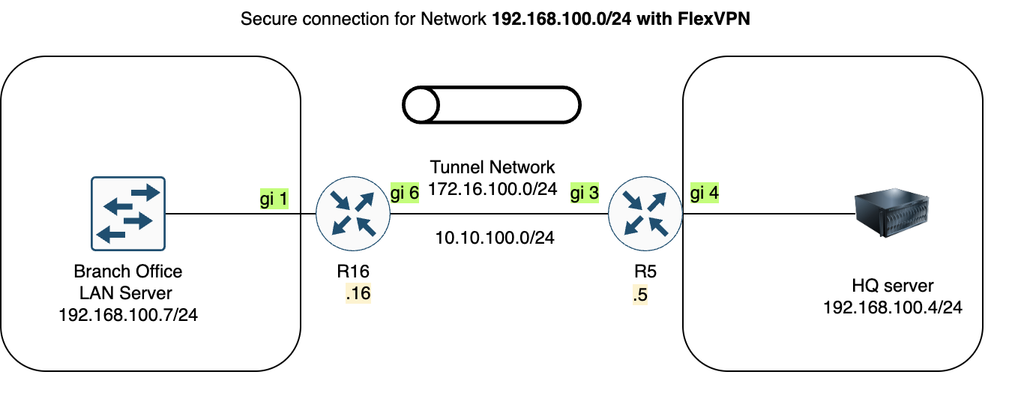
Scenario
- configure the flexVPN between R16 and R5 to provide secure connectivity between LAN Server on branch and HQ servers.
- make tunnel connection using 100 id and password ikev2 is cisco.
Configurations
- To configure L2 secure connection with FlexVPN, first we need to make the IPsec tunnel is up first and the second thing is we move to create pseudo tunnel between each site
Configuration Flex VPN R16
# define host to connect and the pre-share password
crypto ikev2 keyring R5
 peer R5
  address 10.10.100.5
  pre-shared-key cisco
 !
# define profile ikev2
crypto ikev2 profile R5-Ikev2
 match identity remote address 10.10.100.5 255.255.255.255
 identity local address 10.10.100.16
 authentication remote pre-share
 authentication local pre-share
 keyring local R5

# define profile ipsec
crypto ipsec profile R5
 set ikev2-profile R5-Ikev2

# create tunnel inteface vti in the Router
interface Tunnel100
 ip address 172.16.100.16 255.255.255.0
 tunnel source GigabitEthernet6
 tunnel destination 10.10.100.5
tunnel protection ipsec profile R5Configuration Flex VPN R5
# define host to connect and the pre-share password
crypto ikev2 keyring R16
 peer 10.10.100.16
  address 10.10.100.16
  pre-shared-key cisco
 !

# define profile ikev2
crypto ikev2 profile R16-Prof
 match identity remote address 10.10.100.16 255.255.255.255
 identity local address 10.10.100.5
 authentication remote pre-share
 authentication local pre-share
 keyring local R16

# define ipsec profile
crypto ipsec profile R16-Ipsec
 set ikev2-profile R16-Prof

# define tunnel interface vti in the Router
interface Tunnel100
 ip address 172.16.100.5 255.255.255.0
 tunnel source GigabitEthernet3
 tunnel destination 10.10.100.16
 tunnel protection ipsec profile R16-Ipsec
end
Verification Tunnel and Ipsec is up
show crypto ikev2 sa
ping 172.16.100.16 source tunnel100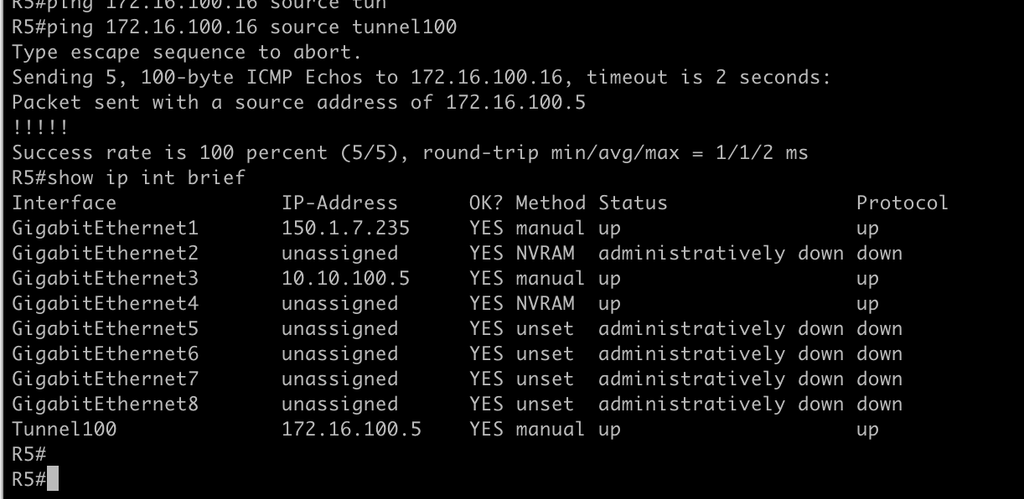
Configuration the L2TPv3 R5
pseudowire-class L2TP
 encapsulation l2tpv3
 ip local interface Tunnel100

default interface gi4
interface GigabitEthernet4
xconnect 172.16.100.16 100 encapsulation l2tpv3 pw-class L2TPConfiguration the L2TPv3 R16
pseudowire-class L2TP
 encapsulation l2tpv3
 ip local interface Tunnel100

default interface gi1
interface GigabitEthernet1
xconnect 172.16.100.5 100 encapsulation l2tpv3 pw-class L2TPVerifications the tunnel L2
show xconnect all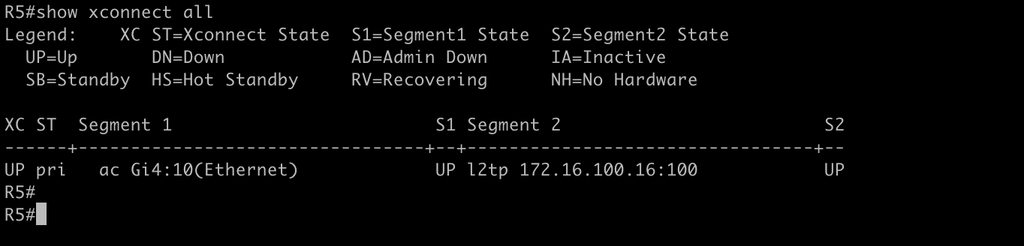
Ping between same subnet from branch to HQ office
ping 192.168.100.4 source gigabitEthernet 0/2 repeat 100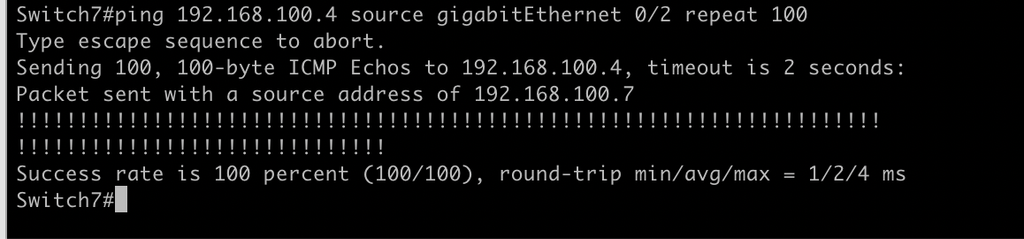
Verifiy the IPsec tunnel is encrypted the packet in the R5 or R16
show crypto ipsec sa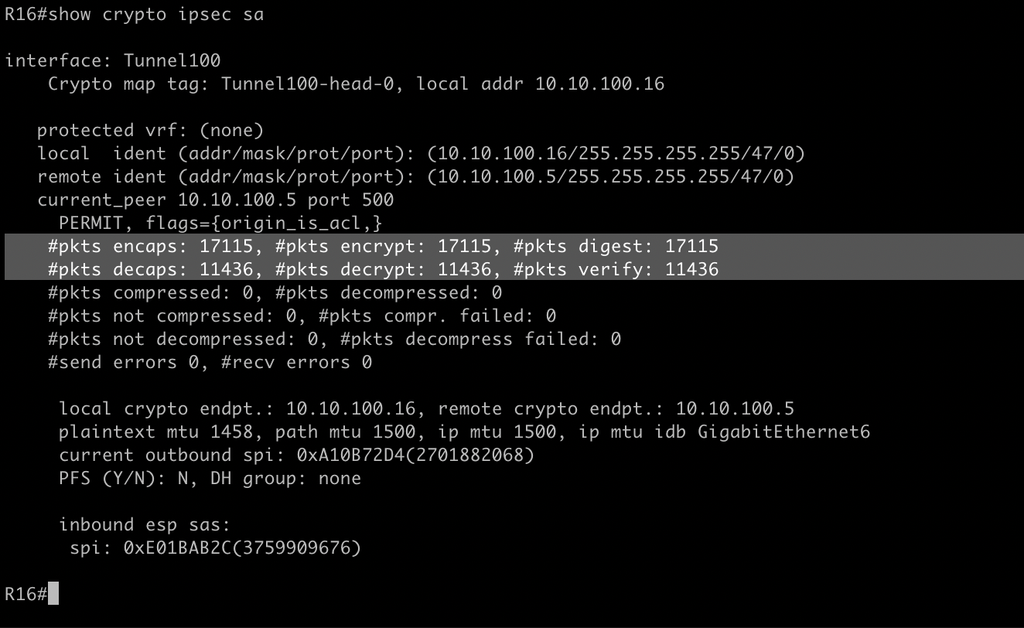
Conclusions
- with FlexVPN we can secure the connection for L2 and L3.
- the FlexVPN make the architecture more scalable because we can also attach routing dyanmic to virtual interface.